[파이썬] OpenCV, OpenPose를 이용하여 사진 속 인물의 자세 추정 - Experimental Model 추가
CMU-Perceptual-Computing-Lab/openpose_train
Training repository for OpenPose. Contribute to CMU-Perceptual-Computing-Lab/openpose_train development by creating an account on GitHub.
github.com
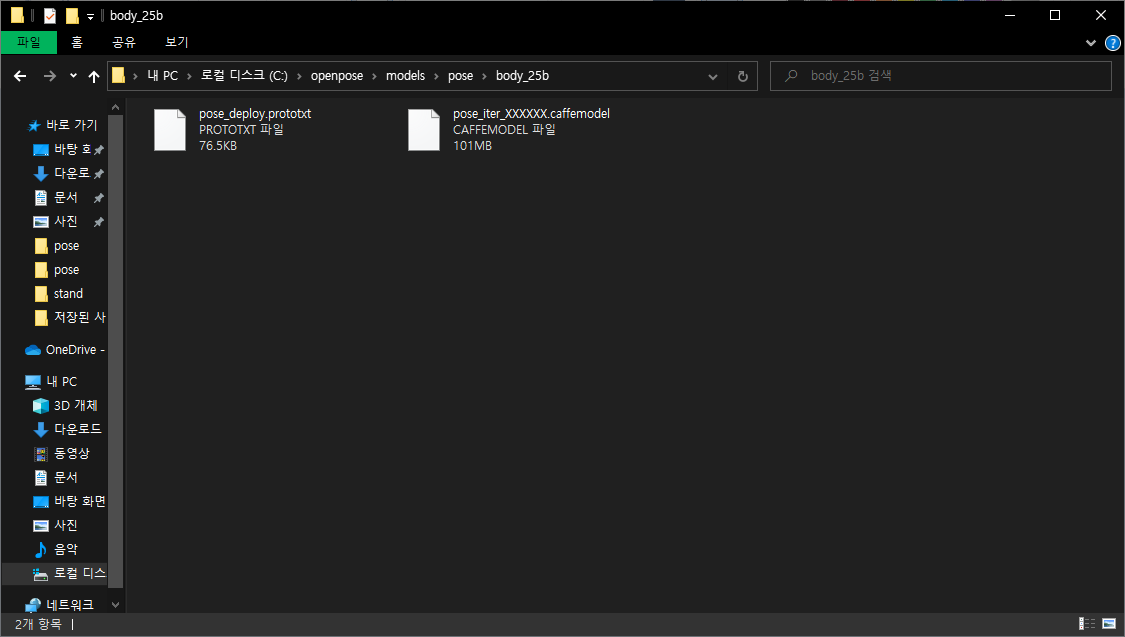
pose_iter_XXXXXX.caffemodel 다운로드 (가중치 파일)
CMU-Perceptual-Computing-Lab/openpose_train
Training repository for OpenPose. Contribute to CMU-Perceptual-Computing-Lab/openpose_train development by creating an account on GitHub.
github.com
pose_deploy.prototxt 다운로드
BODY_PARTS_BODY_25B = {0: "Nose", 1: "LEye", 2: "REye", 3: "LEar", 4: "REar", 5: "LShoulder", 6: "RSoulder",
                       7: "LElbow", 8: "RElbow", 9: "LWrist", 10: "RWrist", 11: "LHip", 12: "RHip", 13: "LKnee",
                       14: "RKnee", 15: "LAnkle", 16: "RAnkle", 17: "Neck", 18: "Head", 19: "LBigToe",
                       20: "LSmallToe", 21: "LHeel", 22: "RBigToe", 23: "RSmallToe", 24: "RHeel"}

POSE_PAIRS_BODY_25B = [[0, 1], [0, 2], [0, 17], [0, 18], [1, 3], [2, 4], [5, 7], [5, 17],
                       [6, 8], [6, 17], [7, 9], [8, 10], [11, 13], [11, 17], [12, 14], [12, 17],
                       [13, 15], [14, 16], [15, 21], [16, 24], [19, 20], [20, 21], [22, 23], [23, 24]]
BODY_25B 모델에 필요한 BODY_PARTS와 POSE_PAIRS 추가
def output_keypoints(proto_file, weights_file, threshold, BODY_PARTS):
global points
# 네트워크 불러오기
net = cv2.dnn.readNetFromCaffe(proto_file, weights_file)
# GPU 사용
net.setPreferableBackend(cv2.dnn.DNN_BACKEND_CUDA)
net.setPreferableTarget(cv2.dnn.DNN_TARGET_CUDA)
# 입력 이미지의 사이즈 정의
image_height = 368
image_width = 368
# 네트워크에 넣기 위한 전처리
input_blob = cv2.dnn.blobFromImage(frame_origin, 1.0 / 255, (image_width, image_height), (0, 0, 0),
swapRB=False, crop=False)
# 전처리된 blob 네트워크에 입력
net.setInput(input_blob)
# 결과 받아오기
out = net.forward()
# The output is a 4D matrix :
# The first dimension being the image ID ( in case you pass more than one image to the network ).
# The second dimension indicates the index of a keypoint.
# The model produces Confidence Maps and Part Affinity maps which are all concatenated.
# For COCO model it consists of 57 parts – 18 keypoint confidence Maps + 1 background + 19*2 Part Affinity Maps. Similarly, for MPI, it produces 44 points.
# We will be using only the first few points which correspond to Keypoints.
# The third dimension is the height of the output map.
out_height = out.shape[2]
# The fourth dimension is the width of the output map.
out_width = out.shape[3]
# 원본 이미지의 높이, 너비를 받아오기
frame_height, frame_width = frame_origin.shape[:2]
# 포인트 리스트 초기화
points = []
print('│' + " POINT ".center(90, '─') + '│')
for i in range(len(BODY_PARTS)):
# 신체 부위의 confidence map
prob_map = out[0, i, :, :]
# 최소값, 최대값, 최소값 위치, 최대값 위치
min_val, prob, min_loc, point = cv2.minMaxLoc(prob_map)
# 원본 이미지에 맞게 포인트 위치 조정
x = int((frame_width * point[0]) / out_width)
y = int((frame_height * point[1]) / out_height)
if prob > threshold: # [pointed]
cv2.circle(frame_drawn, (x, y), 5, (0, 255, 255), thickness=-1, lineType=cv2.FILLED)
cv2.putText(frame_drawn, str(i), (x, y), cv2.FONT_HERSHEY_SIMPLEX, 0.6, (0, 0, 255), 1, lineType=cv2.LINE_AA)
points.append((x, y))
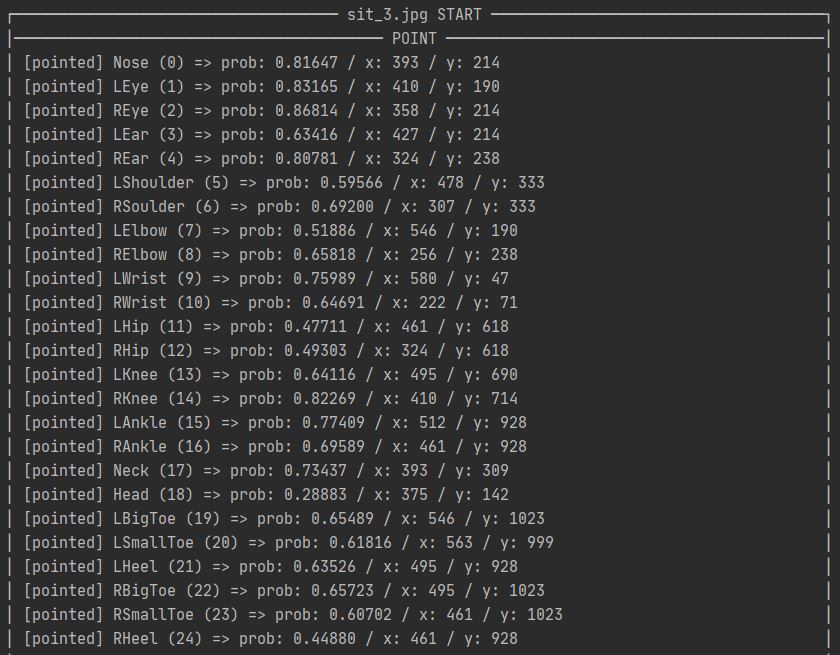
print('{0}│'.format(
f"│ [pointed] {BODY_PARTS[i]} ({i}) => prob: {prob:.5f} / x: {x} / y: {y}".ljust(91, ' ')))
else: # [not pointed]
cv2.circle(frame_drawn, (x, y), 5, (0, 255, 255), thickness=-1, lineType=cv2.FILLED)
cv2.putText(frame_drawn, str(i), (x, y), cv2.FONT_HERSHEY_SIMPLEX, 0.6, (255, 0, 0), 1,
lineType=cv2.LINE_AA)
points.append(None)
print('{0}│'.format(
f"│ [not pointed] {BODY_PARTS[i]} ({i}) => prob: {prob:.5f} / x: {x} / y: {y}".ljust(91, ' ')))frame에 BODY_PARTS를 참고하여 노란색 점을 포인팅 하는 함수
def output_keypoints_with_lines(POSE_PAIRS):
print('│' + " LINK ".center(90, '─') + '│')
for pair in POSE_PAIRS:
part_a = pair[0] # 0 (Head)
part_b = pair[1] # 1 (Neck)
if points[part_a] and points[part_b]:
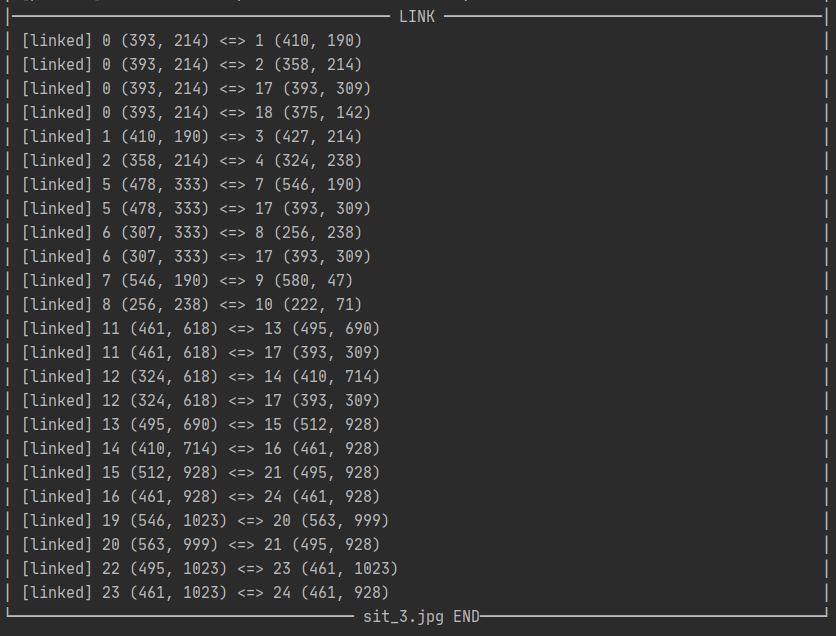
print('{0}│'.format(f"│ [linked] {part_a} {points[part_a]} <=> {part_b} {points[part_b]}".ljust(91, ' ')))
cv2.line(frame_drawn, points[part_a], points[part_b], (0, 255, 0), 2)
else:
print('{0}│'.format(f"│ [not linked] {part_a} {points[part_a]} <=> {part_b} {points[part_b]}".ljust(91, ' ')))frame에 POSE_PAIRS를 참고하여 노란색 점을 초록색 선으로 잇는 함수
# 이미지 경로
image_path = "C:\\Users\\asdfr\\Pictures\\Saved Pictures\\sit\\sit_3.jpg"

# 키포인트를 저장할 리스트 생성
points = []

file_name = image_path.split('\\')[-1]
text_start = ' ' + file_name + " START "
text_end = ' ' + file_name + " END"

print('\n┌' + text_start.center(90, '─') + '┐')
# 이미지 읽어오기
frame_origin = cv2.imread(image_path)  # yolo 및 openpose 로 판단될 프레임
frame_drawn = frame_origin.copy()  # 텍스트 및 테두리가 그려질 프레임

output_keypoints(proto_file=protoFile_body_25b, weights_file=weightsFile_body_25b,
                 threshold=0.1, BODY_PARTS=BODY_PARTS_BODY_25B)
output_keypoints_with_lines(POSE_PAIRS=POSE_PAIRS_BODY_25B)
print('└' + text_end.center(90, '─') + '┘')

cv2.imshow(file_name, frame_drawn)
if cv2.waitKey(0):  # 아무 키나 입력 시 종료
    cv2.destroyAllWindows()
이미지 출처: https://thoughtcatalog.com/kara-crabb/2014/08/how-to-sit-on-a-chair/